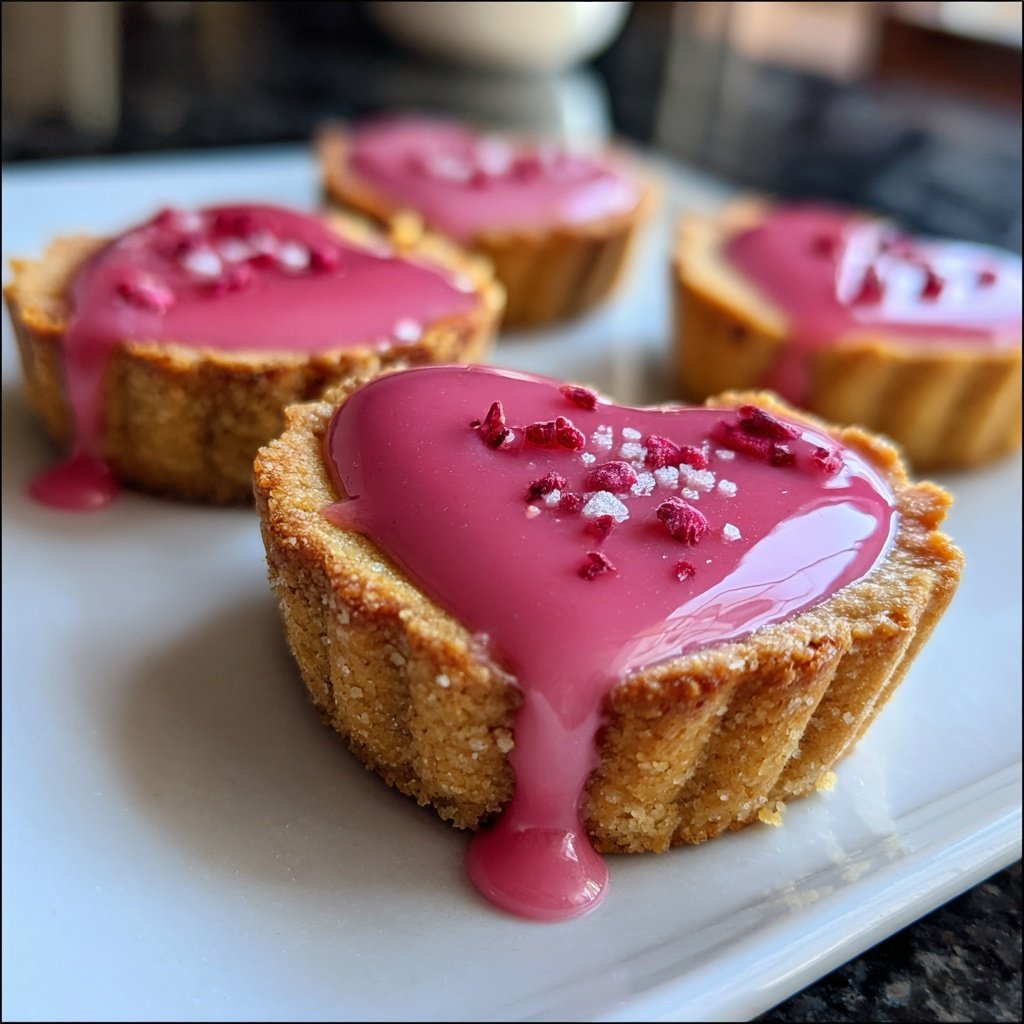
Mini Valentine Tartlets
Highlighted under: Festive Kitchen
I've always believed that the best way to show love is through food, and these Mini Valentine Tartlets are a delightful way to express that sentiment. Each tartlet combines a crispy, buttery crust with a luscious filling, perfect for a sweet celebration. The vibrant colors and charming size make them ideal for sharing with loved ones, whether it's on Valentine's Day or just a random Tuesday. Trust me, the bite-sized nature of these treats will bring smiles and joy to everyone who tries them.
When crafting these Mini Valentine Tartlets, I was inspired by the classic love stories that bloom in the spring. The combination of rich chocolate and fresh fruit elevates a simple dessert into something extraordinary. I learned that chilling the dough before baking prevents it from shrinking—which is a must for achieving that perfect tartlet shape!
As I tasted the first batch, I couldn’t help but smile at how each tartlet offered a balance of sweetness and tang, especially from the addition of fresh strawberries. These little delights are sure to become a regular in my repertoire, especially for romantic dinners.
Why You Will Love These Tartlets
- A perfect sweet treat for sharing on special occasions
- Crispy, buttery crust that perfectly complements the creamy filling
- Endless filling options, making them versatile for all tastes
Flavorful Variations
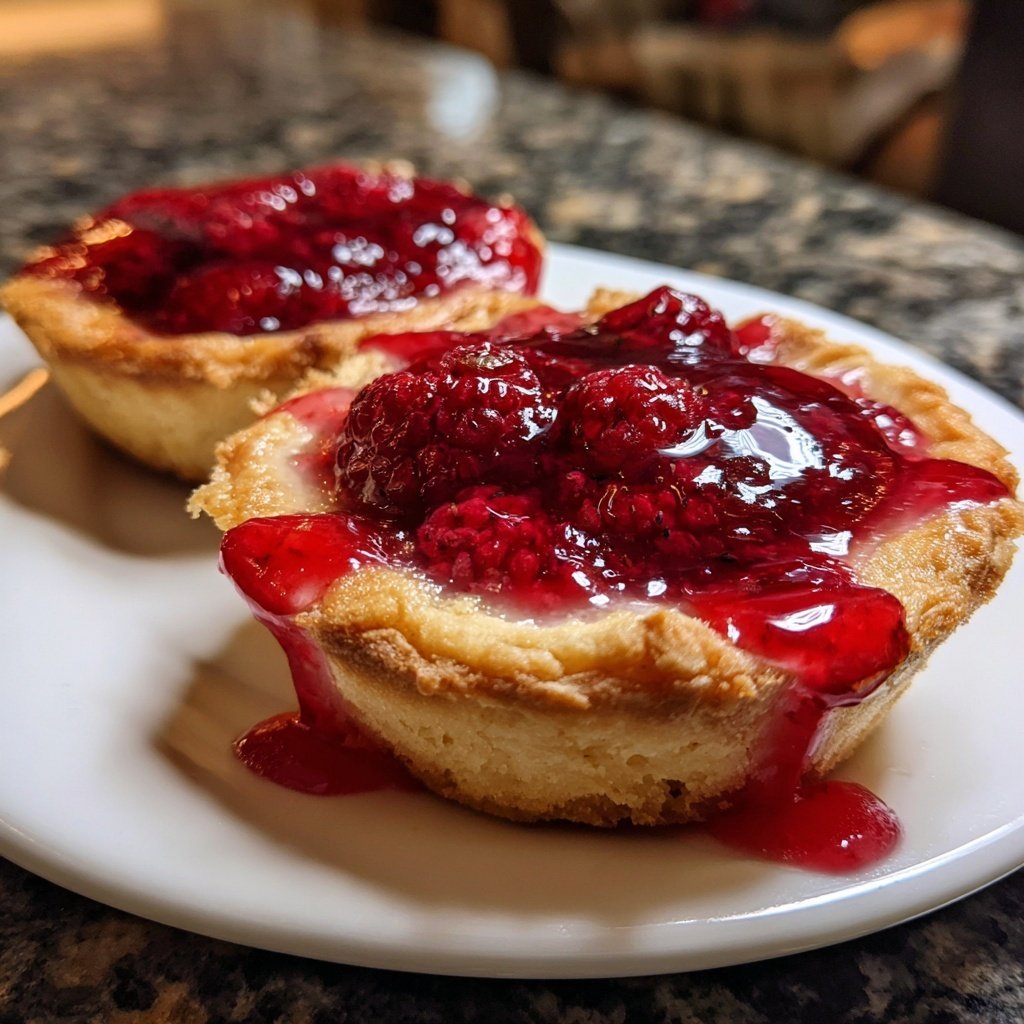
While the chocolate filling is simply divine, feel free to experiment with different flavors to suit your taste preferences. For a fruity twist, consider adding raspberry or lemon curd as your filling. These flavors pair beautifully with the buttery crust and create a refreshing contrast, especially during warmer months. Just remember to adjust the sweetness of your filling based on the acidity of the fruit.
If you’re a fan of nutty flavors, try incorporating a layer of almond or hazelnut spread beneath the chocolate. This adds an extra depth of flavor and creaminess that takes these tartlets to the next level. Make sure to watch the baking time closely, as nut-based fillings can alter the texture and moisture of the tartlet.
Key Baking Tips
When making the tartlet crust, it's essential to ensure your butter is very cold. This helps create a flaky texture in the pastry. If you're short on time, you can chill the butter in the freezer for about 10 minutes before cutting it into the flour mixture. Also, avoid over-mixing the dough, as this can lead to tough crusts; mix just until it starts to come together.
When baking the crusts, keep an eye on their color. They are done when they’re lightly golden around the edges; overbaking can lead to a dry crust. If you notice the crusts puffing up while baking, gently press them down with a fork mid-bake to maintain an even surface for filling.
Ingredients
Ingredients
For the Tartlet Crust
- 1 cup all-purpose flour
- 1/4 cup powdered sugar
- 1/2 cup unsalted butter, cold and cubed
- 1/4 teaspoon salt
- 1 tablespoon cold water
For the Chocolate Filling
- 1/2 cup heavy cream
- 4 ounces dark chocolate, chopped
- 1 tablespoon unsweetened cocoa powder
- 1 tablespoon sugar
- 1 teaspoon vanilla extract
For Garnish
- Fresh strawberries, sliced
- Whipped cream (optional)
- Chocolate shavings (optional)
Instructions
Instructions
Make the Tartlet Crust
In a mixing bowl, combine flour, powdered sugar, and salt. Add cold butter and mix until crumbly. Stir in cold water until the dough forms. Chill in the refrigerator for 20 minutes.
Preheat the Oven
Preheat your oven to 350°F (175°C). Roll out the chilled dough and cut into circles to fit mini tartlet pans. Press the dough into the pans and prick the bottoms with a fork.
Bake the Crusts
Bake the tartlet crusts in the preheated oven for 15-20 minutes, or until lightly golden. Remove from the oven and let them cool completely.
Prepare the Filling
In a saucepan, heat the heavy cream until just simmering. Pour it over the chopped chocolate in a bowl and let it sit for a few minutes. Stir until smooth, then add cocoa powder, sugar, and vanilla extract.
Assemble the Tartlets
Pour the chocolate filling into the cooled tartlet crusts. Chill in the refrigerator for at least 30 minutes until set. Top with sliced strawberries and whipped cream before serving.
Pro Tips
- Make sure to use cold ingredients for the crust to ensure a flaky texture. Experiment with different fillings, such as lemon curd or raspberry jam, for a twist on the classic tartlet.
Storage and Make-Ahead Tips
These Mini Valentine Tartlets can be made ahead of time, making them ideal for stress-free entertaining. You can prepare the crusts a day in advance and store them in an airtight container at room temperature. Alternatively, you can freeze the unbaked crusts wrapped tightly in plastic wrap; just remember to add an extra few minutes of baking time if you bake from frozen.
The chocolate filling can also be prepared in advance. Simply store it in the refrigerator in a covered container for up to three days. When ready to assemble, give it a gentle stir to restore its smooth consistency before pouring into the chilled crusts.
Serving Suggestions
To elevate the presentation of your Mini Valentine Tartlets, consider serving them on a decorative platter surrounded by fresh berries or a drizzle of chocolate sauce. This not only enhances visual appeal but also adds extra flavor that complements the tartlets beautifully.
For an indulgent touch, add a dollop of whipped cream on top of each tartlet just before serving. You can also sprinkle additional chocolate shavings or finely chopped nuts to create a more luxurious dessert experience. This makes them suitable for both casual gatherings and more sophisticated occasions.
Questions About Recipes
→ Can I make these tartlets ahead of time?
Yes, you can prepare the crust and filling a day in advance, just assemble before serving.
→ What can I substitute for dark chocolate?
You can use milk chocolate or white chocolate, but adjust the sugar in the filling accordingly.
→ How do I store leftover tartlets?
Store them in an airtight container in the fridge for up to 3 days.
→ Can I freeze these tartlets?
I recommend freezing the baked crusts and filling separately. Assemble once thawed.
Mini Valentine Tartlets
Created by: Winifred Calder
Recipe Type: Festive Kitchen
Skill Level: Intermediate
Final Quantity: 12 tartlets
What You'll Need
For the Tartlet Crust
- 1 cup all-purpose flour
- 1/4 cup powdered sugar
- 1/2 cup unsalted butter, cold and cubed
- 1/4 teaspoon salt
- 1 tablespoon cold water
For the Chocolate Filling
- 1/2 cup heavy cream
- 4 ounces dark chocolate, chopped
- 1 tablespoon unsweetened cocoa powder
- 1 tablespoon sugar
- 1 teaspoon vanilla extract
For Garnish
- Fresh strawberries, sliced
- Whipped cream (optional)
- Chocolate shavings (optional)
How-To Steps
In a mixing bowl, combine flour, powdered sugar, and salt. Add cold butter and mix until crumbly. Stir in cold water until the dough forms. Chill in the refrigerator for 20 minutes.
Preheat your oven to 350°F (175°C). Roll out the chilled dough and cut into circles to fit mini tartlet pans. Press the dough into the pans and prick the bottoms with a fork.
Bake the tartlet crusts in the preheated oven for 15-20 minutes, or until lightly golden. Remove from the oven and let them cool completely.
In a saucepan, heat the heavy cream until just simmering. Pour it over the chopped chocolate in a bowl and let it sit for a few minutes. Stir until smooth, then add cocoa powder, sugar, and vanilla extract.
Pour the chocolate filling into the cooled tartlet crusts. Chill in the refrigerator for at least 30 minutes until set. Top with sliced strawberries and whipped cream before serving.
Extra Tips
- Make sure to use cold ingredients for the crust to ensure a flaky texture. Experiment with different fillings, such as lemon curd or raspberry jam, for a twist on the classic tartlet.
Nutritional Breakdown (Per Serving)
- Calories: 250 kcal
- Total Fat: 18g
- Saturated Fat: 10g
- Cholesterol: 40mg
- Sodium: 90mg
- Total Carbohydrates: 20g
- Dietary Fiber: 2g
- Sugars: 15g
- Protein: 3g